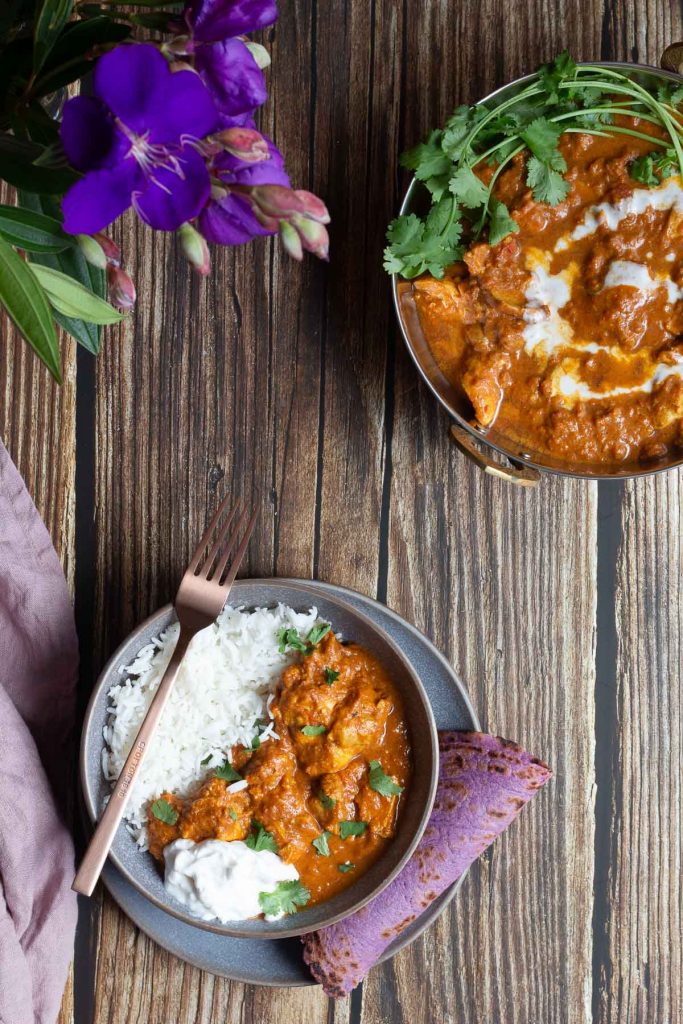
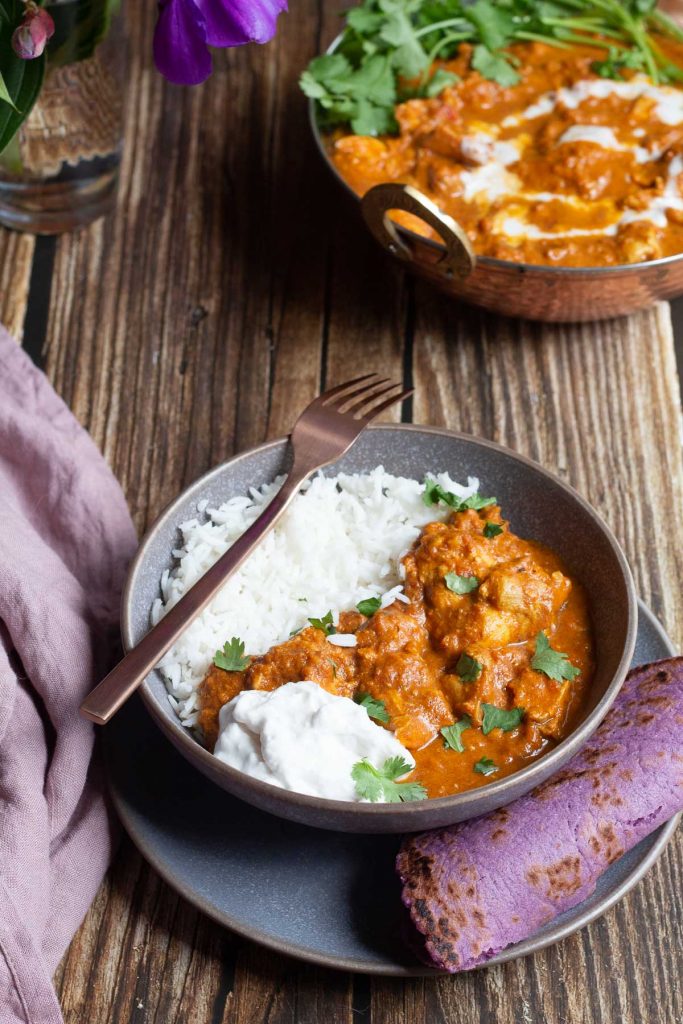
Dairy Free Butter Chicken with Rice uses the pot-in-pot method to cook the curry in your Instant Pot/multicooker at the same time as the rice! It’s genius and I’m so happy with how the recipe turned out - I’m sure you’ll love it. This recipe is also gluten free, Paleo-friendly and can be made keto/low carb and FODMAP-friendly! YAY! I've provided suggestions for cooking on the stove or slow cooker/crockpot and you can also use dairy if you prefer.

Sometimes the recipes that provide a unique method - or minimal ingredient list - to make cooking easier while delivering on maximum deliciousness are actually the hardest to develop!
And so it is with this Dairy Free Butter Chicken and Rice. Not only did I want to replicate the light creaminess of a traditional Butter Chicken made with dairy, but I wanted to use the pot-in-pot method to cook the rice at the same time as the Butter Chicken in the Instant Pot/Multicooker.
I think this recipe took at least 10 attempts to get right, mostly due to trying to balance the cook times of the rice with the chicken to make sure everything was cooked through but not overcooked. So, it’s fair to say this recipe has been tested and tested over time to make it perfect! You can also make it in a stovetop pressure cooker.
If you want to cook it on the stovetop in a skillet/large frypan/saucepan or the slow cooker/crockpot, I've also given instructions below for those. Nobody misses out on delicious food on my watch!
Jump to:
- ❓What is Pot-in-Pot cooking?
- 👉 What you’ll love about this recipe
- 👉 FODMAP-friendly option
- 🍛 Dairy Free and Paleo-friendly Butter Chicken
- Sign up to the email list
- 🥣 Ingredients you’ll need
- 🔪 Equipment you’ll need
- 💡 How to get the best results
- ❓FAQs including stove top instructions and slow cooker/crockpot
- 🐓 Step by step photos
- 🍜 Other recipes you'll love
- 📋 Recipe
- Dairy Free Butter Chicken and Rice {Instant Pot/Multicooker/Pressure Cooker}
❓What is Pot-in-Pot cooking?
Pot-in-pot cooking refers to a steaming technique where you cook food in a second cooking vessel placed on a trivet inside the inner pot that you normally cook in. The steam that comes from either water or another dish that's cooked in the main inner pot helps to cook the food above it.
Pot-in-pot cooking has many uses:
- baking cakes such as my Blood Orange cake
- to cook a smaller than normal amount of rice
- to cook a main dish at the bottom of the inner pot and then a second dish, such as rice, in a second vessel placed above
- to make easy sticky rice that doesn’t require a long soak time
- for steaming foods
In this Butter Chicken recipe, the curry is cooked as normal in the main pot and the rice is cooked over the top of that, using a trivet and a non-stick cake tin. It all comes together in around 40 minutes - using the pot-in-pot method also means one less pot to look after. This really takes the convenience of Instant Pot/multicookers/pressure cookers to the next level. You can also choose to cook less rice than specified in the recipe if you'd like to freeze some of the curry for later.
If you're looking for a great Pot-in-Pot resource, I highly recommend checking out The Inquiring Chef's Pot-in-Pot post.
👉 What you’ll love about this recipe
- Restaurant quality - made right at home with an easy method
- Fuss-free: I've skipped the more traditional marinating to make this super quick
- Cooking the rice at the same time as the curry is a true game changer
- Dairy-free, but with all the flavour you love in Butter Chicken
- Affordable, easy to access ingredients
- Anti-inflammatory and gut-microbiome-friendly - the ginger, garlic and spices are a health kick in disguise
- Food intolerance friendly: Gluten-free, dairy-free, Paleo-friendly*
- Perfect for freezing or meal prep: Freezes perfectly for leftovers or suitable for meal prep
- Economical - the Instant Pot/multicookers are energy efficient and cooking the rice at the same tie as the curry improves on that - the ingredients are also very affordable
*omit the rice for strict Paleo, and cook cauliflower rice instead in a separate frypan/skillet
👉 FODMAP-friendly option
If you're following a low FODMAP diet, you can make the following changes to make this recipe for Butter Chicken FODMAP-friendly:
- omit the garlic and replace the olive oil with garlic-infused olive oil (this is FODMAP-friendly)
- add an extra 3 teaspoons of grated ginger
- add 200g (7 oz.) of chopped fennel bulb when cooking the curry (helps to thicken the sauce)

🍛 Dairy Free and Paleo-friendly Butter Chicken
Traditionally, Butter Chicken is made with - you guessed it - butter! I prefer not to eat much dairy, so I’m always working on dairy-free recipes that are also Paleo-friendly. You won’t miss the dairy in this recipe at all - I promise! Also, for those that don’t like coconut, the flavour isn’t noticeable at all given the rich flavour of the ginger, garlic, spices and tomato. For strict Paleo, omit the rice and cook some cauliflower rice in a separate frypan/skillet instead.
If you do prefer to use dairy, refer to the FAQ section below.
Sign up to the email list
Never miss a new recipe or article again!
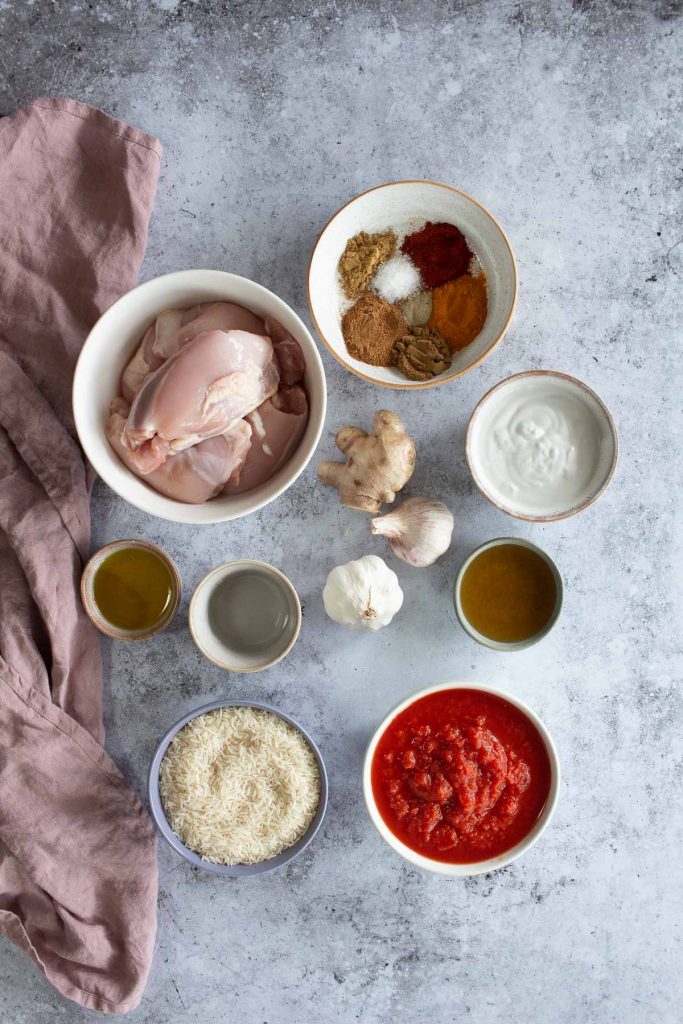
🥣 Ingredients you’ll need
Please see the recipe card below for full details.

- Garlic cloves
- Fresh ginger
- Olive oil
- Spices - garam masala, turmeric powder, smoked paprika, coriander powder, ground cumin, white pepper, cooking salt
- Crushed or diced tomatoes
- Basmati rice
- Boneless, skinless chicken thighs (left whole)
- Full fat coconut cream
- Honey
- To serve: coriander leaves, naan bread or my purple flatbread!
🔪 Equipment you’ll need
- Instant Pot/Multicooker/Pressure Cooker
- Trivet
- Non-stick cake tin - 20cm/8 inch*
- Aluminium foil to make a sling
- Measuring cup and spoons
- Chopping board, knives
- Box grater
- Wooden spoon
This recipe can also be made on the stove if you don't have an Instant Pot/multicooker.
*Please note that your cake tin may get some staining on the bottom from the curry sauce. I use a dedicated cake tin specifically for pot-in-pot cooking.
💡 How to get the best results
- Read the recipe through fully and have all your ingredients ready to go before you start. That might sound obvious, but it’s worth mentioning - I know I personally have a tendency to rush sometimes and often regret it! This is definitely a recipe where you want to follow it correctly.
- If you’re new to Pot-in-Pot cooking, have a look a the images/video provided, so you can understand how the technique works in this recipe
- Make sure to use a metal cake pan for the rice! Glass doesn't conduct heat as well as metal, so the rice may not be cooked through if you use a material other than metal. A smaller size than 8"/20cm may work, but hasn't been tested. If in doubt, cook a smaller amount of rice if using a smaller tin.
- I don’t recommend substituting ingredients although you can use dairy if you tolerate it. Using another type of rice instead of basmati may not work. Please don't use chicken breast or chop the thigh fillets before cooking...both options will be too dry.
- The first time you make this recipe, I recommend keeping an eye on your Instant Pot/pressure cooker/multicooker. One time I made it, the timer started counting down before pressure had been reached. All multicookers and even Instant Pot models are different. I tested using my Philips multicooker.
❓FAQs including stove top instructions and slow cooker/crockpot
Yes! I always like my recipes to be accessible to as many people as possible. I want everyone to be able to make this special recipe. I haven't made this on the stove, but here is my suggestion, and remember you will need to cook the rice separately.
To cook this recipe on the stove, prep your ingredients as specified but cut the thighs in thirds. Heat a large skillet/frypan on medium heat, then add half the olive oil with the garlic and ginger. After a minute, add the remaining oil and then the spices. Cook for a minute, stirring. Next add the tomatoes, water and the chicken. Reduce heat to medium-low, then cook for 10 or so minutes until the chicken is cooked through. If the liquid level gets too low, add a bit more water. Once the chicken is cooked through, ensure the sauce is pretty thick (not too watery) and then add the coconut cream and honey and mix well. If the sauce looks a bit thin, you can reduce it over high heat for 5 minutes before adding the coconut cream and honey.
Remove the chicken, and use a stick blender to get a smooth sauce - this is optional. You may need to transfer to a larger pot to avoid splatter. Or you can do this in a standard blender. Return the chicken to the sauce and serve the Butter Chicken with the rice, naan and coriander.
Yes! I haven't personally tested this in the slow cooker/crockpot but have consulted other recipes for this suggestion. Remember you will need to cook the rice separately and you will need to start the cooking process on the stove in a skillet.
To cook this recipe in the slow cooker/crockpot, prep your ingredients as specified and leave the thighs whole. Heat a large skillet/frypan on medium heat, then add half the olive oil with the garlic and ginger and stir. After a minute, add the remaining oil and then the spices. Cook for a minute, stirring.
Transfer the mixture to your slow cooker/crockpot, spread it over the base. Then lay the chicken thighs on top, followed by the tomatoes.
Put the lid on the slow cooker/crockpot and cook on high for 1 ½ to 2 ½ hours or on low for 4 to 6 hours, until the chicken is cooked through. Cook time will depend on your slow cooker/crockpot but it's hard to overcook chicken thighs. You can remove a thigh and cut it open to check that none of the flesh is pink. When the chicken is done, remove it to a cutting board and let cool slightly. Keep the slow cooker/crockpot on the "Keep warm" setting.
Add the coconut cream and honey to the slow cooker/crockpot sauce and then blend with a stick blender (optional). Or you can do this in a blender. Cut the chicken in to large bite sized pieces and return to the slow cooker. Stir and then serve with rice, naan and coriander/cilantro leaves.
This recipe was developed to be made with white basmati rice as the cook time complements the cook time for the chicken thighs. Jasmine rice can be used in place of the basmati rice as the cook time is similar.
If you'd like to make this recipe with brown rice or black rice, you will need to cook those separately to the curry as they take longer to cook than basmati rice.
Yes, you can make this recipe in your stovetop pressure cooker. Although the psi pressure level can vary between types of machines, I don't believe it will cause any problems.
Because pressure cooking and this method of Pot-in-Pot cooking requires precision and a minimum amount of sauce/liquid, I don't recommend halving the recipe for example. Using less chicken will leave you with a lot of extra sauce. You can cook less rice if you like, just ensure to use 1:1 ratio between rice and water.
You sure can! Add some butter and some cream (heavy cream, double cream or thickened cream are all fine) instead of the coconut cream - after the curry is cooked and has cooled a little. If you add it when the sauce is still hot, the sauce may turn out too thin.
You need the equivalent of ½ cup in total to replace the coconut cream, so for example you can measure ¼ cup of cream in a measuring jug and then add some butter to bring it to ½ cup total. You can still use olive oil to sweat the garlic and spices at the start of the recipe, or use ghee (butter may burn if used at this step).
Butter Chicken is one of the mildest curries - there is only a tiny bit of chilli in the garam masala. My recipe here is full of flavour, but not spicy as in hot. If you are serving this recipe to kids, then you can reduce the spice levels a bit or you can also add more coconut cream at the end.
I know a lot of people don't like coconut - I personally can't taste coconut once the recipe is finished because only a small amount is used and the flavouring from the ginger, garlic and spices is a more dominant flavour. If you are serving picky eaters or you really hate coconut, then consider using the dairy option explained above.
🐓 Step by step photos
This is definitely a recipe where you want to follow the steps correctly to get the best results. Having a visual reference is so helpful when using a new cooking technique such as pot-in-pot.
These step by step photos for making the Dairy Free Butter Chicken are from the point after your ingredients are prepped and you start cooking.
Please read the recipe card below for full instructions.

🍜 Other recipes you'll love
If you like the look of this Dairy Free Butter Chicken and Rice, then you'll love these tasty recipes:
- Dairy Free/Vegan Palak Paneer (Saag Paneer)
- Black Rice Congee with Shiitake and Ginger
- Butter Beans with Caramelised Onions, Kale and Preserved Lemon
📋 Recipe
🌟 Did you make this recipe? Leave a ⭐️⭐️⭐️⭐️⭐️ star rating and a comment below to let us know how it turned out. Save it for later by pinning to your favourite Pinterest board and make sure to tag us on Electric Vitality's Instagram to show off your cooking!

Dairy Free Butter Chicken and Rice {Instant Pot/Multicooker/Pressure Cooker}
Equipment
- Instant Pot/Multicooker/Pressure Cooker
- Trivet
- Non-stick cake tin (20cm/8 inch)
- Aluminium foil to make a sling
- Measuring cup and spoons
- Chopping board
- Box grater
- Knives
- wooden spoon
Ingredients
Rice
- 2 cups white basmati rice (omit for keto, replace with cauliflower rice cooked separately)
- 2 cups water
Spice blend
- 1 ½ teaspoons garam masala
- 1 ½ teaspoons smoked paprika
- 1 ½ teaspoons turmeric powder
- ¾ teaspoons coriander powder
- ½ teaspoon ground cumin
- 1 ½ teaspoons cooking salt
- ½ teaspoon white pepper
Curry
- 8 med-large garlic cloves (peeled and minced)
- 6 teaspoons finely grated ginger (from a fat 3cm/1.5 inch piece)
- 2 ½ tablespoons olive oil (use a little extra if needed)
- spice blend (as above)
- 1 can (14 oz. or 410g) crushed or diced tomatoes
- ⅓ cup water
- 1 kilogram (2.2 pounds) chicken thigh fillets (boneless, skinless and left whole)
To add after cooking
- ½ cup coconut cream
- 2 tablespoons honey (omit for strict keto)
To serve (optional)
- coriander (cilantro) leaves
- naan bread
- coconut yoghurt
Instructions
- Start by soaking the rice in water and set aside - it needs to soak for 15 minutes.Finely grate the ginger, peel and roughly mince the garlic.Press the saute/brown button, wait a few minutes for it to heat up and then add the oil. Add the garlic and ginger - stir for a minute until fragrant.
- Add the remaining oil and the spices - stir for another 30 seconds. Turn off the saute function. Remove the mixture to a bowl and set aside.
- To the inner pot, pour in the crushed tomatoes and ⅓ cup water. Ensure to scrape off anything stuck on the bottom of the inner pot and mix well. Optional - Using a damp paper/kitchen towel, wipe down the sides of the inner bowl or rinse it out. This prevents the rice getting any sauce colour on it.
- Add the chicken thighs on top of the tomato-water mixture.
- Layer the ginger-garlic-spice mixture on top of the chicken thighs.
- Next, add the trivet to sit on top of all the curry ingredients.
- Using a 75cm/2.5 ft piece of aluminium foil - folded in half and half again along the length - create a sling for the cake tin and place it under the cake tin.Drain the rice well and add it to the cake tin (without the water).
- Hold the sling on each side - pretty close to the tin itself - and lower the tin into the inner pot to sit on the trivet.
- Add the 2 cups water to the rice.
- Give the rice and water a gentle stir to evenly distribute and ensure it’s all covered by water.
- Roll down/fold the sling on each side so that the pressure cooker/multicooker lid will close. Leave the cake tin uncovered.
- Place the lid on the pressure cooker/multicooker, lock it and seal the vent.
- Cook for 8 minutes at high pressure and then 10 minutes natural release. IMPORTANT: if your multicooker/Instant Pot gets a burn error or has done previously with similar recipes, you will need to add some more water (eg. ¼ cup) to the bottom of the pot under the chicken. Don't add extra water unless absolutely required.
- At the end of cooking, remove the lid and fluff the rice with a fork.
- Carefully remove the cake tin with the rice as it will be hot. It might have some sauce on the bottom so be careful where you place it on your kitchen bench to prevent staining. Cover the rice with some foil to keep it hot.
- Remove the chicken, chop into large bite sized pieces and set aside.
- If you had to add more water to the curry, you will need to press the saute button to reduce the sauce for 5 minutes.Add the coconut cream and honey and blend the sauce with a stick blender. This is optional, but is best for a smooth and thick sauce. You could also do this in a regular blender once the sauce has cooled a bit.
- Return the chicken pieces back to the sauce, turn the pot to saute if the butter chicken needs heating up. Adjust the salt if you prefer more. Serve straight away with rice and any sides like naan.Store in the fridge for up to 3 days or the freezer for up to a month. Store the rice separately to the curry or together in portioned meal sizes.


Very interesting concept - pot-in-pot cooking! Haven't really tried this method except for when maybe we make dumplings or wonton soup noodle meals. Your step by step recipe makes tis rice and butter chicken dish look so easy to make!
This dish looks so delicious and comforting! Perfect for an easy mid-week dinner